Gå til hovedinnhold
Havforskningsinstituttet
HI
English
<- Tilbake
Søk
Søk
Søk
View page in English
Figur
Fra rapporten:
Cruise report Hywind Tampwn 19 to 26 October 2024
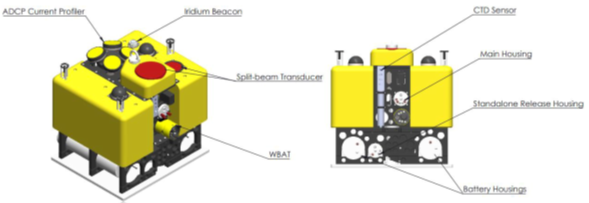
Figure 2. Deploying the Lander (top). Picture by K. de Jong. Lander with main components (bottom). Picture from Lander manual.